
The Ultimate Guide to Growing Bottlebrush
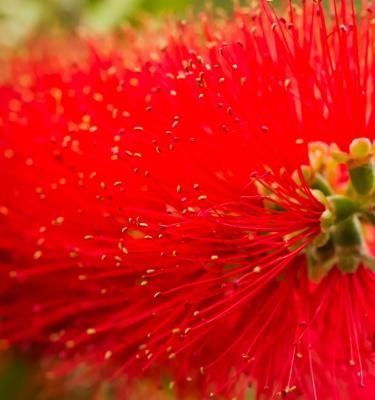
Bottlebrush gets their common name because their fluffy, blooms are shaped like old-fashioned bottle brushes. Botanically called Callistemon, Bottlebrushes are hardy Australian native plants and you’ll find varieties with flowers in red, pink, white, and soft yellow.
Bottlebrushes come in a range of sizes from low-growing shrubs to much taller varieties that can easily form hedges and screening - so there is one to suit just about any garden. These spring-to-summer flowering beauties are well suited to growing in full sun to part shade spots. However, for more flowers plant them in as much sun as possible.
Bottlebrushes trees will grow in heavy clay soils or sandy soils and they don’t mind a light frost either. Although they’ll tolerate damp soil for a short period of time, it’s best to choose a free-draining spot or grow them in pots if needed.
5 top tips for growing Bottlebrush
- Bottlebrush prefer a full sun to part shade spot. Sunny spots will give you more blooms!
- Prune Bottlebrush back after flowering to encourage bushy growth and more flowers the following spring.
- Fertilise Bottlebrush with a low phosphorus fertiliser like Scotts Osmocote Plus Organics All Purpose (including Natives) Plant Food & Soil Improver
- The compact/dwarf varieties of bottlebrush grow well in pots or containers - use a native suitable potting mix like Scotts Osmocote Native Potting Mix
- Bottlebrush can tolerate a hard prune back. This is especially good to do if your bottlebrush hasn’t flowered and is full of bare, spindly growth. Cut it back by MORE than half and remove as much thin twiggy growth as possible.
Essential shopping list for growing bottlebrush
- A Bottlebrush (Callistemon spp.) potted plant
- Scotts Osmocote Compost Premium Soil Improver
- Scotts Osmocote Plus Organics All Purpose (including Natives) Plant Food & Soil Improver
- Garden Shovel
- If growing in pots, you’ll need Scotts Osmocote Native Potting Mix and Scotts Osmocote Controlled Release Fertiliser: Native plus a suitable pot or container
- Defender Pyrethrum Insect Spray
Preparation
Choose a full sun to part shade location for your bottlebrush, ideally with a free-draining soil - although check the label as some varieties are more tolerant of an occasionally damp soil.
Bottebrush will tolerate any soil type (sandy or heavy) but they do love it improved a little before planting mix Scotts Osmocote Plus Organics All Purpose (including Natives) Plant Food & Soil Improver mixed through the top 20-30 of the soil. If your soil is easily waterlogged, consider growing bottlebrush in a pot instead.
Growing bottlebrush in the garden
Plant bottlebrush into your prepared garden soil - it’s best to plant them outside of the peak heat of summer so they don’t get overly stressed.
Dig the hole twice as wide as the original nursery pot and the same depth. Gently remove your bottlebrush from the nursery pot, tease roots if they are compact and plant into the hole. Backfill around the plant and water in well.
Mulch thickly around the base of the bottlebrush to retain moisture and suppress weeds, but keep the mulch away from the main stem.
Growing bottlebrush in pots
Bottlebrush can be grown in medium to large pots or planters with good drainage - choose a pot that’s 2 to 3 times bigger than the original nursery pot. You can always increase the pot size as the plant grows and repot it every 1-2 years as needed.
Fill your pot or planter with Scotts Osmocote Native Potting Mix. Gently remove the bottlebrush from the nursery pot, tease the roots if they are compact and plant into the potting mix at the same height it was in the original pot. Backfill around the plant with more potting mix and water in well.
Mulch over the surface of the potting mix to help retain moisture.
Bottlebrush fertilising & care
An annual feed in late winter with Scotts Osmocote Plus Organics All Purpose (including Natives) Plant Food & Soil Improver is all that a bottlebrush will need. Unless you have a very sandy soil, which might require a second annual fertiliser application.
At the end of the flowering season prune your bottlebrush all over to remove the spent flowers and encourage new growth for the following year.
Mature and established bottlebrush - particularly those that haven’t flowered in a while or those that are looking long and leggy - can be pruned even harder. In these situations prune the bottlebrush back by at least half and remove as much of the thin twiggy growth as you can.
Fertilise potted bottlebrush with Scotts Osmocote Controlled Release Fertiliser: Native once a year in late winter.
Common bottlebrush diseases & pests
Provided you’ve chosen the right variety to suit your conditions, bottlebrush are fairly pest and disease free.
Scale can from time to time become a problem on bottlebrush (particularly on the younger growth) - spray infested areas with Defender Pyrethrum Insect Spray.


