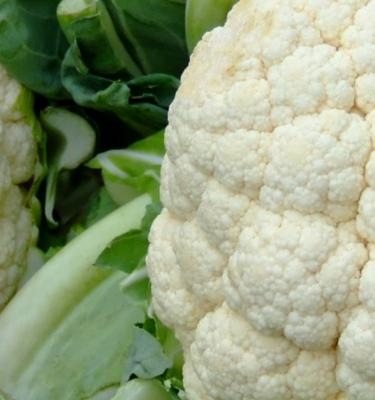

How to grow & care for cauliflower
Drizzled with olive oil and baked whole or sliced into steaks, cut into individual florets and wok-tossed in a stir fry or grated to make delicious cauliflower rice, it’s a mainstay of winter meals. It’s also a significant contributor to a healthy diet and is high in fibre.
Top 5 Steps to Growing Cauliflower
- Choose an open, sunny spot with plenty of room for plants to grow without competition
- The best soil is a deep, free-draining with plenty of added compost
- Sow seeds into trays or punnets then transplant seedlings into the vegetable garden when they are large enough – don’t sow seeds direct where plants are to grow
- Plant out by mid-autumn in temperate and cool climates
- Add Scotts Performance Naturals Tomato, Vegetable and Herb Fertiliser before planting
Prepare
Buy either seeds for sowing into seed trays or seedlings for immediate planting. Check the varieties available will do well in your climate – buy locally as they should be suitable. A couple of weeks before transplanting seedlings, dig the soil over, adding Scotts Performance Naturals Soil Improve.
Plant
Cauliflowers, especially traditional varieties, do best in the veggie garden or raised veggie box where they have plenty of space to fully develop.
Growing cauliflower in the garden or veggie box:
- A few days before planting, add a 100 to 150mm deep layer of Scotts Performance Naturals Soil Improver over the soil
- Follow this with Scotts Performance Naturals Vegetable Fertiliser at the rate recommended on the tub
- Work both into the top 300mm of soil with a fork
- Check labels for recommended plant and row spacings and mark out planting holes with the trowel
- Carefully remove seedlings from punnets or trays without disturbing roots and place each a little deeper in the soil than it was in the tray.
- Firm but don’t compact the soil
- Water in immediately
- Spread snail and slug pellets to protect young seedlings from overnight marauders
- Keep soil moist but never wet, to promote good growth
Growing mini cauliflowers in pots:
- Choose mini varieties
- Plant one seedling per 300-400mm diameter pot
- Use Scotts Performance Naturals Premium Potting Mix
- Plant each seedling slightly deeper than it was in the seedling punnet to encourage better roots
- Water in immediately
- Place pot where it will receive plenty of direct sun
- Keep potting mix moist but not wet
As well as the common white cauliflower, there are now lime green and even bright purple varieties available! They all have similar flavour and can be cooked the same ways too.
Harvest
Cauliflowers are ready to harvest when the edible heads are well developed and, in the case of the traditional types, they are bright white and densely packed. As they mature, the heads will become visible through the leaves that protect them.
Pick before the florets start to separate from one another and look they’re about to flower. Cut from the plant close to ground level, using a sharp knife. Trim the tough outer leaves away but leave the tender inside ones surrounding the head – these may be cooked in stir fries or added to steamed greens.
Cauliflowers are at their tastiest and most tender when freshly picked but they can be stored in the crisper section of the refrigerator for a week or so. Avoid plastic bags as they may sweat and develop black markings.
Cauliflowers can be frozen. Cut into individual florets, blanch for a minute or two in boiling water then drain well. Lay out separately on a tray to freeze, before putting them into bags or containers for storage. Use within three months.

Pests & Diseases
Caterpillars

The most common pest of cauliflowers and other brassicas is the green caterpillar of the cabbage white butterfly, which lays its eggs generally on the undersides of leaves. These are smaller than a pinhead, often yellow and on stalks. The caterpillars are voracious, with the first signs of their presence often holes in the leaves that almost grow bigger while you watch!
- A vegetable dust insecticide is the best preventative. If you see the butterflies around your crop, dust the plants well, making sure to apply it to the undersides as well as upper surfaces. The caterpillars will get a good dose as soon as they hatch. Reapply after rainfall or watering.
Aphids

Sap-sucking aphids love the young leaves of brassicas! They also are often found on the developing heads of cauliflowers, cabbages and Brussels sprouts. Severe infestations will cause distortion of leaves and affect the quality of the crops.
- Regular applications of Defender Pyrethrum targeting the pests will control them, as will eradication of other host plants including many common weeds like milk thistles, dandelions and even chickweed.
Snail & Slugs
An entire crop of young seedlings can disappear overnight if snails and slugs are present in your veggie garden!
- Check plants at night and remove by hand
- Cover soil around plants with crushed eggshells or grit
- Protect plants with Defender Snail and Slug Pellets – use bait traps when children and animals are present
Mildew

This fungal disease may develop when there is insufficient space and air circulation around plants – that is, when humidity may be high. It appears as a white or sometimes black powder on the surface of the leaves.
- A general-purpose copper-based garden fungicide will generally keep it under control.


