
How to grow & care for dill
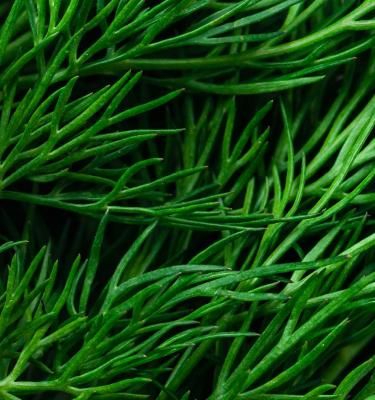
Dill is a herb with a strong, aromatic flavour that’s commonly paired with fish, white meats, cream cheese, eggs and vegetables. Dill’s delicate blue/green leaves have a flavour that is similar to fennel and its flowers and seeds are also edible.
Grow dill from seeds or potted plants year round in frost free climates or plant after the chance of frost has passed in spring or summer. Choose a full sun spot in your garden or grow in pots. Dill is a tall growing herb (40-90cm tall), so plant at the back of a garden bed or herb garden or plant amongst other plants that can offer wind protection and support its growth.
As an annual herb, dill will die once it's finished flowering (or its hit by a frost) but the seeds can be saved and replanted again.
Top 5 steps to growing dill
- Dill prefers to grow in a full sun location
- Sow seeds directly where you want them to grow
- Harvest dill leaves as you need them. To collect the seeds leave them until the seed heads have turned from green to brown.
- Dill can reach nearly a metre tall, giving it room to grow and support from surrounding plants to protect it from blowing over in the wind.
- Fertilise with Scotts Osmocote® Controlled Release Fertiliser: Tomato, Vegetable & Herb in spring.
Shopping List
- Dill seeds or potted plants
- Scotts Osmocote® Compost Premium Soil Improver
- Scotts Osmocote® Controlled Release Fertiliser: Tomato, Vegetable & Herb
- If growing in pots, Scotts Osmocote® Plus Organics Tomato, Vegetable & Herb Potting Mix and a suitable pot
- Garden trowel
- Mulch
- Defender Slug & Snail Pellets
Prepare
Dill is most commonly grown from seeds or potted plants. Choose a full sun spot, that can easily be watered during the hottest months of the year.
Dig the hole twice as wide as the original nursery pot and the same depth. Mix a small amount of Scotts Osmocote® Compost Premium Soil Improver through the original soil at the base of the planting hole.
Planting dill in the garden
Plant dill into prepared soil by removing it from the nursery pot and placing it into the centre of the planting hole. Dill does not like root disturbance, so don’t tease or disturb the roots when planting. Water it in well and mulch around the plant to retain moisture and suppress weeds.
Let the dill plant establish in its new home and put on fresh growth before you start harvesting. Dill leaves can be harvested using sharp scissors whenever you need them. The leaves and flowers are both edible, they can be used in cooking or as pretty garnish. The leaves and seeds can be dried and stored for use later.
Growing dill from seeds
Sow dill seeds year-round or once the risk of frost has passed in cooler climates — as dill seedlings don’t like being transplanted it’s best to sow seeds directly where you want the plant to grow. Sprinkle the seeds on the surface of the prepared soil and lightly cover with soil or potting mix - keep them moist while they germinate which should take 10-14 days.
Mulch around established dill plants to retain moisture and suppress weeds.
Planting dill in pots
Dill can be grown in medium to large pots with good drainage that are at least 30-40cm deep by the same width.
Fill the pot with Scotts Osmocote® Plus Organics Tomato, Vegetable & Herb Potting Mix, before removing the dill plant from its nursery pot and planting into the prepared pot. Backfill around the root ball and water in well.
If growing from seeds direct sow the dill seeds onto the potting mix in your chosen pot. Lightly cover with more potting mix and keep moist until they germinate in 10-14 days.
Add a light layer of open organic mulch to retain moisture during the warmer months.
Harvest & Maintenance
Harvest dill when you need it - it’s best eaten immediately after picking. Regular harvesting will help keep the plant compact and neat. Both the leaves and flowers are edible and can be used fresh, added to cooking or used as a garnish. Dill is also a common ingredient in homemade pickles and preserves.
The dried seeds can be collected once the seed head turns brown. Once fully dried the seeds can be stored for use in cooking or planting at a later date.
Dill doesn’t need a lot of fertiliser, but will benefit from a dose of Scotts Osmocote® Controlled Release Fertiliser: Tomato, Vegetable & Herb in spring.
Pests & Diseases
Dill is rarely attacked by pests or diseases. If slugs and snails become a problem for young dill seedlings use beer traps (saucers filled with beer) or sprinkle Defender Slug & Snail Pellets around your plants.


