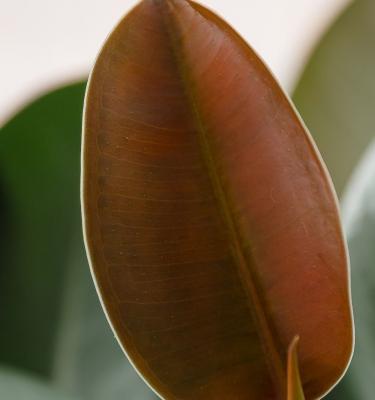

How to grow & care for Rubber Plant
Rubber Plant (Ficus elastica) are very popular indoor plants because they’re so easy to grow. Rubber Plants are loved for their big leaves - that come in a few different colours and their ability to grow tall. If you continue to increase the size of the pot each year, they can quickly reach the ceiling in the right indoor environment! But if you’d prefer to keep your Rubber Plant more compact, don’t increase the size of the pot when you re-pot it.
Rubber Plants prefer a bright spot indoors away from direct sunlight - direct sun, particularly hot afternoon sun, can burn the leaves. You’ll find Rubber Plants in different forms including those with dark green or dark purple leaves and variegated forms with leaves mottled white/green or pink/green.
Top 5 steps to growing Rubber Plant
- Rubber Plant prefer a spot with bright indirect light - direct sun can burn their leaves
- Use a premium, like Scotts Osmocote Premium Potting Mix for Indoor Plants to give your plant the best start possible
- Rubber Plants can grow tall - repot them each year into a slightly larger pot using Scotts Osmocote Premium Potting Mix to encourage taller growth
- Fertilise Rubber Plants with an indoor plant fertiliser like Scotts Osmocote Pour+Feed for Indoor Plants during spring and summer, to encourage strong healthy growth.
- Wipe their large leaves from time to time, to keep them dust free and shiny.
Shopping List
- A Rubber Plant plant
- A suitable pot
- Scotts Osmocote Premium Potting Mix
- Scotts Osmocote Pour+Feed for Indoor Plants
- A potting mix scoop
- Defender Pyrethrum Insect Spray
Growing Indoors or in a pot
Choose a pot for your Rubber Plant that’s roughly 2 times the size of the original nursery pot - make sure it has drainage holes or use a black plastic pot that sits snuggly inside a cover-pot or cache pot (pot with no holes).
Half fill your pot with Scotts Osmocote Premium Potting Mix and gently remove the Rubber Plant from the nursery pot and position it into the potting mix, backfill around the root ball with more potting mix so that the potting mix is level with or slightly below the top of the pot.
Water your new Rubber Plant in well and tip out any excess water from the base of the coverpot or saucer (if using). Rubber Plants prefer to dry out between waterings, make sure the top 5-10cm of soil is dry before watering again.
Fertilising & Care
Fertilise Rubber Plants fortnightly in spring and summer with an indoor plant fertiliser to encourage new growth. Use Scotts Osmocote Pour+Feed for Indoor Plants - this is a simple to use ‘measure and pour’ feed which contains the right balance of nutrients. If you’d prefer a longer term fertilising product, with less applications apply Scotts Osmocote Controlled Release Fertiliser for Indoor Plants - this product feeds for up to 6 months.
In the warmer months of spring and summer Rubber Plants will appreciate a more regular watering, but only when the top 5cm of potting mix is dry. In winter time when they are not actively growing, you can ease off on the watering.
Remove any dead or damaged leaves to promote new growth. If any branches or stems become too long and leggy, cut them back to encourage bushy growth.
WARNING - when cutting a Rubber Plant or removing a leaf it will ooze a milky sap that is toxic and a skin irritant. Keep Rubber Plants out of reach of pets and children.
If you want your Rubber Plant to grow taller, repot it every 1-2 years into the next pot size up, with Scotts Osmocote Premium Potting Mix.
Pests & Diseases
Look out for distorted new growth and obvious signs of pests on the undersides of leaves. Aphids and mealybugs can from time to time become a problem on Rubber Plants - use Defender Pyrethrum Insect Spray to control them if needed.
Because Rubber Plants have large leaves, they tend to collect a lot of dust! Remove the dust with a damp, microfibre cloth regularly to keep your plant healthy.


