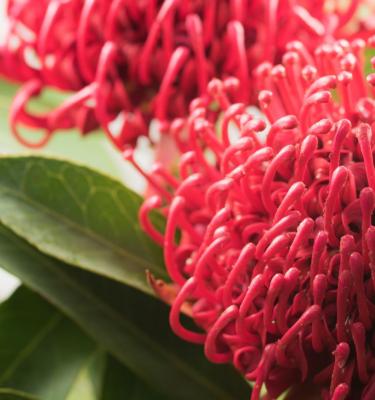

The Ultimate Guide to Growing Waratah Flowers
Waratah (Telopea species) are Australian native plants loved for their large flowers that come in a range of colours including red, white, pink, and even yellow. Waratahs thrive in warm temperate and cool temperate climates when planted in full sun to part shade (depending on the variety).
Waratahs are long-lived plants that flower in spring and range in height from 1-5 metres depending on the variety. The more compact plants can successfully be grown in pots. Waratah’s prefer a free draining, slightly acidic soil.
Waratah flowers are wonderful cut and nectar-loving birds will enjoy flocking to them in your garden.
5 top tips for growing Waratah flowers
- Waratah flowers prefer a full sun to part shade spot (somewhere with protection from hot afternoon sun is ideal for some varieties)
- Prune waratahs plants back by half after they’ve finished flowering to help maintain their shape and promote next year's flowers.
- Fertilise waratah plants with a low phosphorus fertiliser like Scotts Osmocote Plus Organics All Purpose (including Natives) Plant Food & Soil Improver
- The compact varieties of waratah grow well in pots or containers - use a native suitable potting mix like Scotts Osmocote Native Potting Mix
- Waratahs are susceptible to root rot if their soil is waterlogged or not free-draining.
Essential shopping list for growing waratah flowers
- A waratah plant
- Scotts Osmocote Compost Premium Soil Improver
- Scotts Osmocote Plus Organics All Purpose (including Natives) Plant Food & Soil Improver
- Garden Shovel
- If growing in pots, you’ll need Scotts Osmocote Native Potting Mix and Scotts Osmocote Controlled Release Fertiliser: Native plus a suitable pot or container
- Defender Pyrethrum Insect Spray
Preparation
Choose a full sun to part shade location for your waratah (depending on the variety, always check the label), with a free-draining soil.
Waratah flowers will tolerate any soil type (sandy or heavy) so long as it is free draining. To improve your soil in the area before planting mix Scotts Osmocote Plus Organics All Purpose (including Natives) Plant Food & Soil Improver through the top 20-30 of the soil. If your soil isn’t free draining, consider growing waratahs in a pot instead.
Planting waratahs in the garden
Plant waratahs into your prepared garden soil - it’s best to plant them outside of the peak heat of summer.
Dig the hole twice as wide as the original nursery pot and at the same depth. Gently remove your waratah from the nursery pot, tease roots if they are compact, and plant into the hole. Backfill around the plant and water in well.
Mulch thickly around the base of the waratah to retain moisture and suppress weeds, but keep the mulch away from the main stem. A thick layer of mulch will also help to keep the roots cool - particularly during hot summers.
Planting waratahs in pots
Waratahs can be grown in medium to large pots or planters with good drainage - choose a pot that’s 2 to 3 times bigger than the original nursery pot. You can always increase the pot size as the plant grows and repot it every 1-2 years as needed.
Fill your pot or planter with Scotts Osmocote Native Potting Mix. Gently remove the waratah from the nursery pot, tease the roots if they are compact, and plant into the potting mix at the same height it was in the original pot. Backfill around the plant with more potting mix and water in well.
Mulch over the surface of the potting mix to help retain moisture and keep the roots cool, but keep the mulch back from the main stem.
Waratah fertilising & care
An annual feed in late winter with Scotts Osmocote Plus Organics All Purpose (including Natives) Plant Food & Soil Improver is all that waratahs will need. Unless you have very sandy soil, which might require a second annual fertiliser application.
At the end of the flowering season prune them back to waist height - this will encourage next season's flowers to be at eye level. Mature and established waratahs can be pruned even harder, back to just above ground level - this is because they’ll have an established “lignotuber” beneath the ground, which allows the plant to easily regenerate after a bushfire.
Fertilise potted waratahs with Scotts Osmocote Controlled Release Fertiliser: Native once a year in late winter.
Common waratah pests & diseases
Waratah is most prone to root rot in soggy or water-logged soil. If your soil isn’t free draining, try growing them in raised beds or pots to prevent root rot.
Scale can from time to time become a problem on waratahs (particularly on the younger growth) - spray infested areas with Defender Pyrethrum Insect Spray .


