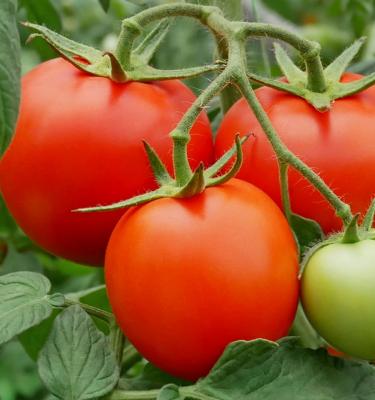

Top tips for growing tomatoes in New Zealand
Nothing beats the taste of your own homegrown tomatoes, freshly picked and warmed by the summer sun. Slice them into a summer salad, use as pizza toppings or add some richness to Bolognese sauce. Whether you're growing them in garden beds, pots or hanging baskets, we've got you covered with all you need to know about growing tomatoes.
When is tomato season in New Zealand?
- Sow – August to September
- Plant – September to November
- Harvest – December to March
Varieties to grow
Choose tomato varieties that suit your cooking and taste needs – whether you grow tomatoes for snacks, salads, sandwiches or bottling sauces and relishes, there are tomato varieties for the whole family to enjoy. Choose a variety (or several) that best suit your garden space too. Below are some popular varieties.
- For small salad or snacking tomatoes grow cherry tomatoes such as ‘Sweet 100’ or ‘Wee Sweetie’.
- For pasta sauces or bottling look for acid free ‘Roma’ or fleshy ‘Beefsteak’.
- If you have plenty of space and love large fleshy tomatoes plant ‘Beefsteak’, ‘Dads Delight’ or ‘Mortgage Lifter’.
- If planting heritage or heirloom varieties look for ‘Moneymaker’, ‘Black Krim’ or ‘Brandywine’. Save seed from the fruit at the end of the season for next season’s crop.
- Popular dwarf or semi dwarf varieties that do not require staking are ‘Russian Red’ or ‘Scorsby Dwarf’.
- For pots and containers or hanging baskets try ‘Tumbling Tom’.
Grow your plant
Step 1
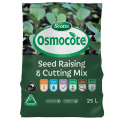
Sow seed in early to mid-spring into individual pots, seed trays or egg cartons filled with a quality Scotts Osmocote Seed Raising & Cutting Mix.
Place the seed containers in a warm spot indoors to germinate or in a glasshouse. They don’t need to be in direct sunlight to germinate, but as soon as the seedlings emerge, they should be moved into bright light. This will prevent the seedlings from stretching and becoming spindly and leggy. Keep moist but not wet.
Step 2
When the seedlings are 5-8cm high and able to be handled by their first set of true leaves, thin the seedlings out. Carefully prick seedlings out into 9cm pots filled with a quality Scotts Osmocote Vegetable & Herb Mix to grow the seedlings on. Water well and place them in bright light, but not direct sunlight.
Step 3
As the weather warms and the risk of frost passes, gradually harden the plants off by placing them outside during the day and bringing them in at night for protection. Do this for 5-7 days. Once temperatures are consistently around 20 degrees Celsius they are ready to plant out.
Step 4
Choose a sunny sheltered position in the garden that receives at least 6 hours of sunshine per day. Prepare the garden bed by digging it over and adding Scotts Osmocote Compost & Soil Improver. Water the seedlings prior to planting.
Step 5
Dig a hole, large enough for the tomato seedling root ball, in the prepared garden bed mix Scotts Performance Naturals Vegetable & Herb Mix into each planting hole. Make sure tomatoes are spaced out at 50-60cm intervals. Good air circulation is important to prevent disease.
Step 6
Gently tap the tomato seedling out of the pot, try and keep the seedling root ball intact to minimise transplant shock. Place the tomato plant into the planting hole and backfill, firming the seedling into the ground. Water well. Stake plants now to minimise root damage.
Step 7
Tomatoes are heavy feeders and so require regular feeding as they grow lots in a short time. Once the first truss of fruit has set, regular feeding will ensure juicy flavourful fruit. Feed using Scotts Performance Naturals Tomato, Vegetable & Herb Liquid Fertiliser every two weeks.
Planting in pots, containers and hanging baskets
Step 1
Select a pot that is at least 30-50cm wide and deep, the bigger the better. Anything smaller will not hold enough moisture and dry out too quickly. As tomatoes are heavy feeders, nutrients will deplete quickly and won’t hold enough water if the pot is too small.
Step 2
Half fill the container with a quality free draining potting mix such as Scotts Osmocote Vegetable, Tomato & Herb potting mix which contains the right blend of nutrients, including a controlled release fertiliser for sustained feeding.
Step 3
To plant, gently loosen the root ball and position the seedling in the centre of the container. Continue filling the container with potting mix to approximately 3cm from the top, firming around the seedling as you fill.
Step 4
Tap the container to settle the mix and water well. If growing tall tomato varieties, put stakes in place at the time of planting.
Tip
Avoid filling the pot right to the top of the rim, allow a 3cm space for watering.
Tomato care
- Tomatoes can be planted deeply, up to the first leaves as they form adventitious roots from the stem. This creates a sturdier plant if planted deeper.
- Regular feeding and consistent watering are important for a successful crop.
- The best time to water is early in the morning. Avoid wetting the foliage when watering as this can spread disease.
- Tie the tomatoes as they grow and remove laterals. Laterals are shoots that grow between the main stem and the leaf branch. These should snap easily between the fingers and be removed so that the plant puts it energies into producing fruit rather than foliage.
- Once tomatoes set fruit remove the lower leaves, especially those have started to yellow, this improves air circulation and prevents disease spreading.
- Depending upon the variety, once plants are 1.5m high, pinch out the main growing tip. Only do this when at least five trusses of fruit have set.
- For smaller bush types such as ‘Russian Red’ there is no need to remove laterals, but if plants become heavily laden with fruit, they may need staking for support.
Harvesting
Harvest tomatoes when they are fully coloured and soft but firm to touch.
Late in the season when temperatures drop and plants are not at their best and need to be removed to make space for winter vegetables, green fruit can be picked and ripened on a sunny windowsill.
FAQs
Which leaves do I cut off tomato plants?
Remove the lower leaves of tomato plants to encourage fruit production, improve airflow and prevent soil-borne diseases. You can also pinch out small shoots between the main stem and branches for better fruit production in New Zealand.
Do tomatoes grow better in pots or in the ground?
Tomatoes grow well in both pots and the ground in New Zealand. Choose pots for better control of soil and water, but plant in the ground for larger harvests and stronger plants, provided the soil is fertile.
What month is best to plant tomatoes in New Zealand?
Plant tomatoes in New Zealand from September through to November, once the last frost has passed in your region. Warm soil and consistent temperatures are crucial for successful growth.
When should I plant cherry tomatoes in New Zealand?
Like regular tomatoes, you can plant cherry tomatoes in New Zealand from September through to December. These months provide optimal temperatures for germination and growth.


