
How to grow potatoes in New Zealand
The humble potato, rich in iron and potassium, is a staple on the dinner tables around New Zealand. Roasted, boiled, mashed or in a salad – no matter how you serve yours, homegrown potatoes always taste better dug fresh. Plant only certified seed potatoes for guaranteed disease-free tubers.
When to grow potatoes
- Plant – August to December
- Harvest – December to March
Potato varieties to grow in New Zealand
Potato varieties are classed as early, early/main and main. Early varieties are ready in 90 days, main crops 100 days and late crops 120+ days. Early varieties are harvested when the tops are still green, early/main and main crops are harvested when they have finished flowering and the foliage has died down completely.
- Early varieties: Rocket, Cliff Kidney, Jersey Benne, Swift
- Early/main varieties: Nadine, Ilam Hardy, Summer Delight, Summer Beauty
- Main varieties: Rua, Agria, Heather
Grow your potato plant
Potatoes are frost tender, so start sprouting your tubers in a warm, sunny, spot 4-6 weeks before planting. This is called ‘chitting’. You can plant and grow your potatoes from August-December in New Zealand. In cooler regions plant when the risk of frost has passed.
Planting potatoes in garden beds
Select a certified seed potato variety and sprout potatoes until the shoots are approximately 2-4cm long. Remove spindly weak shoots. Plant in a well-drained soil in full sun.
Step 1
Before planting enrich the soil with organic matter by digging in Scotts Osmocote® Compost & Soil Improver and Scotts Sheep Pellets, this also adds valuable nutrients to the soil.
Step 2
Dig a trench (furrow) 10-15cm deep and add a layer of . Place the sprouted seed potatoes in the bottom of the trench with the shoots facing upwards at 25cm spacings.
If planting multiple rows space the trenches (furrows) 30-40cm apart.
Step 3
Cover the seed potatoes with 5cm of Scotts Osmocote® Vegetable Mix so that the tops of the sprouts are just showing through. Water well. Continue to mound the potatoes as shoots grow to encourage tuber development, until they are approximately 30cm tall.
Step 4
Continue watering, especially during dry periods. Avoid wetting the foliage - water the soil between the mound.
Step 5
Feed your potatoes with Scotts Osmocote® Tomato, Vegetable & Herb Controlled Release Fertiliser to replenish nutrients and improve crop yield.
Tips
Mound seed potatoes, especially main and late crop varieties, so that the developing potatoes do not turn green and to prevent the tuber moth caterpillar spoiling the crop.
Early varieties do not need as much mounding as early/main and main crop varieties.
Planting potatoes in pots, containers
If you have limited space, pots and containers are a good way to go. Ensure the container is at least 30-50cm wide and 50cm deep with drainage holes in the bottom. Early maturing varieties are good for growing in pots and containers, for a 50cm container you will need 5 seed potatoes.
Step 1
Fill a container 1/3 full with Scotts Osmocote® Vegetable Mix.
Step 2
Push the pre-sprouted seed potatoes into the potting mix in the bottom of the pot with shoots pointing up. Completely cover and water well.
Step 3
As plants grow and green shoots appear, continue covering with potting mix. Repeat until the potting mix reaches the top of the container.
Keep well watered, especially in dry spells. Feed with Scotts Osmocote® Tomato, Vegetable & Herb Controlled Release Fertiliser to replenish nutrients and improve crop yield.
Tips
Use a quality potting mix rather than garden soil. Over time soil will compact down, which leads to poor drainage and restricts growth. Garden soil also doesn’t have the balance of nutrients that potting mix has for a bumper yield.
Ensure container grown potatoes are consistently watered as they dry out quicker.
It is easier and you will be more successful growing early maturing potato varieties in containers. They are smaller in size and more suited to growing this way.
Potato plant care
- Water consistently between the rows, especially in hot dry weather.
- Feed your potatoes with Scotts Osmocote® Tomato, Vegetable & Herb Controlled Release Fertiliser.
- Avoid planting potatoes in the same space each season, and not where tomatoes, capsicum and eggplant have grown in previous seasons as they are of the same family and susceptible to the same diseases.
Harvesting your potatoes
Early varieties can be harvested after 90 days when they start to flower, and the foliage is still green. Some varieties such as Nadine, Swift and Rocket will have very few flowers. Early varieties do not store well.
To test keeping quality, rub the potato skin with your finger if the skin rubs off easily, the variety is not good for storing, so eat right away.
Main and late varieties can be harvested when completely brown and foliage has died off. Potatoes can be left in the ground until ready for eating or dug up and stored in a cool dry place.
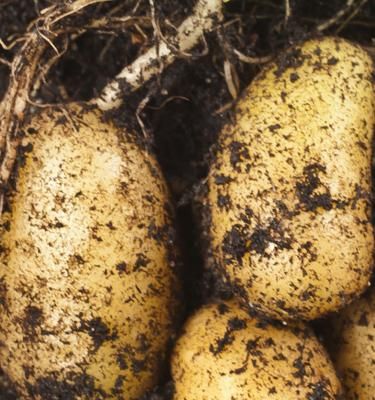
Another way to test if your crop is ready for harvest, dig down below the soil by hand, and feel for potatoes. This is called ‘bandicooting’. If they are of good size, they are ready for eating.


