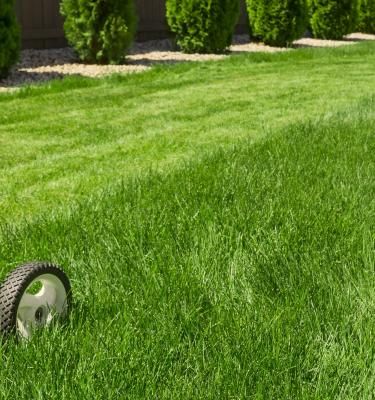
Spring Lawn Care Guide
Coming out of winter, most lawns look a little worse for wear. This is usually due to the cold soil and air of winter, which can slow growth and thin lawns. Grass browning and thinning is a common lawn problem in spring. And in regions where most of the year’s rainfall occurs in winter, poor drainage and lack of soil aeration may cause lawns to turn yellow – not a pretty sight for any lawn-lover!
But all that’s behind us now. With spring in the air, more hours of sunshine and warmer temperatures, the lawn is about to put on a burst of lush, green growth. If you treat it right, that is. Spring is the time to rejuvenate the lawn, repair any damage, and get it into top shape for summer. So, it’s time to get busy in the backyard!

Ten spring lawn care tips for a lush lawn renovation
Apart from allowing nature to improve the overall appearance of your lawn, there’s quite a list of tasks that you can take on to make the most of your expanses of green grass.
1. Time it right
We know you’re eager to get that lawn looking lush, but the key to spring rejuvenation is not to start too early. The best time for lawn maintenance in spring is at least mid to late September, when days are longer, the sun warmer and nights less likely to be frosty. If you encourage vigorous new growth too soon in the season, it may be damaged by late frosts.
2. Maintain your mower
Here’s a cutting-edge mowing tip to make light work of spring mowing: service your mower. Early to mid-spring is a great time to get your mower prepared for the workload ahead. If it’s a four stroke, change the oil, check the condition of the spark plug, air filter and the blades. Two stroke mowers should also have the spark plug and air filter checked.
If the blades are very worn, they should be replaced. Otherwise, clean them up and sharpen them with a wet stone or fine file. The spring lawn may be soft and lush and if the mower is not serviced, it may not be up to the task at hand and could even rip your lawn up.
If you’ve been mowing with a catcher over winter, change to mulch mowing now and put the catcher in the shed.
3. Scalp your lawn for a fresh spring start
Scalping involves cutting back the grass to its minimum length. While it may seem counterintuitive, it’s a great springtime strategy for breathing new life into your lawn (scalping stimulates growth). Scalping is also a great way to prepare your lawn for overseeding and dethatching. Cutting your lawn short gives you better access to the thatch layer so it’s easier to remove and lets new grass seed reach the soil.
4. De-thatch (or scarify) your lawn for a springtime boost
The best time to dethatch or scarify lawn in Australia is early spring. Most lawns will only need to be dethatched once a year.
Using a steel pronged garden rake, go over the lawn vigorously to remove garden debris and, importantly, strip out dead and brown grass (that the "thatch") to allow more direct sun through the sward (expanse and depth of the lawn) to the soil surface. This will encourage new shoots and invigorate older growth.
5. Let your lawn breathe with lawn aeration
Soil contains pockets of air that let water and nutrients reach the lawn’s roots. When soil gets compacted, it loses these air pockets. Aerating the lawn after dethatching allows air, moisture, fertiliser and warmth to penetrate into the soil around the roots of the lawn.
Spring is the perfect time to aerate your lawn. Aeration leaves little holes in the lawn, but your lawn will easily be able to repair itself in the growing season.
6. Dress your lawn with lawn top-dressing
Topdressing can help if your soil is particularly heavy, poorly drained, compacted, or the lawn surface is uneven.
After aerating the lawn, use a premium quality topdress mix and work it into the lawn with the back of your rake. Follow the instructions on the bag for how much to apply.
See our guide to learn more about How & Why You Should Top Dress Your Lawn.
7. Oversow bare patches
Bare patches can be oversown with a lawn seed blend around mid-spring. Don’t sow too early because the seeds need warmth to germinate and grow away. Choose a seed mix that will match or complement your existing lawn. Break up the soil crust on bare spots by raking, sow the seeds and keep them moist until they sprout.
There’s more information on lawn repair in our guide to fixing thinning and bare patches.
8. Fertilise for a thriving lawn
Come springtime, your lawn will need a good feed with a spring lawn fertiliser to replace nutrients lost during winter, so if you only fertilise the lawn once a year, now is the time to do it! But don’t fertilise too early in the season. If you’re using a granular fertiliser, an average soil temperature above 15 degrees is needed for nutrients to be released.
If you want to cut down your to-do list, you can use a grass fertiliser for spring paired with other spring lawn treatments like Lawn Builder + Wetting Agent (if your soil doesn’t absorb moisture well) or Lawn Builder Grub + Insect (if you know grubs and insects are problem for you).
If your lawn needs a quick pick-me-up before the next application of slow-release fertiliser, use either Lawn Builder Extreme Green hose-on or Lawn Builder Buffalo hose-on. They are readily absorbed and go to work immediately!
9. Weed, weed, weed
As grass puts on a surge of growth in early to mid-spring, weeds can do the same. Feeding the lawn to thicken it up will help keep weeds at bay. Very sparse areas are the most likely to become infested with weeds but even the best kept lawn can fall victim to a wind-blown seed.
You can first try removing weeds by hand. But if you need something a little more robust, try a weed killer like Scotts Lawn Builder + WeedKill for the first fertiliser application. You can use this before weeds get a stranglehold.
10. Hydrate your lawn but avoid overwatering
Spring can be an awkward time of the year when it comes to watering. The days may be bright, warm and sunny but the nights are cool, maybe even frosty. The soil may still be quite cool, which means it will retain moisture for longer than you think.
Depending on your location, there can also be a fair bit of rainfall in spring. If you get frequent rain where you are, this’ll be enough to water the lawn. If it’s a dry spring, you might need to water.
Regardless of how much natural rainfall you get, make sure to test how damp your lawn is before watering. Burrow your finger down into the soil. If it feels damp, don't water.
Spring lawn care FAQs
What's the best time of year to repair holes in your lawn?
Spring is the best time to repair holes in your lawn. This is because it’s the peak growing season, meaning lawns are more easily able to repair themselves and grow over holes in the lawn.
How can you control moss in your lawn?
Treat moss in shady areas with a solution of iron sulphate applied as a spray or with a watering can. Re-apply if necessary after two weeks.


