
How To Plant and Grow Kale
Kale is an easy to grow leafy vegetable that has become popular thanks to its superfood status because it’s rich in essential nutrients. It’s closely related to broccoli, cabbage and brussels sprouts - so it likes similar growing conditions.
One of the best things about growing kale is that the leaves can be harvested one-by-one as you need them, for cooking or eating raw in smoothies or salads.
For the sweetest and most tender leaves it’s best to plant and grow kale during the coolest months of the year. In the northern growing regions of Australia sow seeds of kale in early July. Those in the warm temperate and cooler climates should plant kale seeds or seedlings in autumn, winter or early spring.
There is a huge range of kale varieties to choose from - but the 3 main types are:
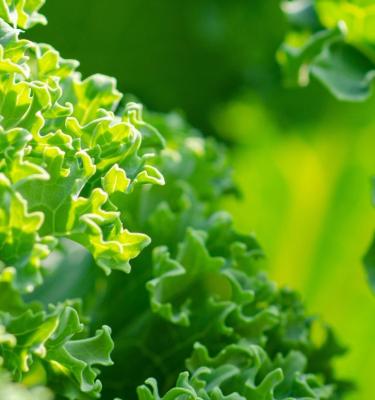
- Curly kale - the leaf edges are tightly frilled or curly. Best grown in cold climates for the sweetest flavour.
- Red Russian - large flat leaves with oak-like edges and a deep red central vein. Sweet leaves with a hint of pepper. Loves a frosty winter.
- Tuscan Kale or Cavalo Nero - produces long slender dark green leaves with a pebble-like dimple to them and a nutty flavour.
Harvest a few leaves from each kale plant as you need them - leaving the central leaves to continue growing and providing you with a long harvest period.
Top 4 steps to growing kale
- Choose a full sun position (or part shade if growing in northern Australia)
- Cold weather will produce the sweetest and most tender leaves.
- Harvest the outer, lower leaves leaving the youngest leaves to grow for the next harvest.
- You can begin harvesting kale when the leaves are about the size of your hand.
Shopping List
- Kale seeds or seedlings
- Scotts Osmocote Compost Premium Soil Improver
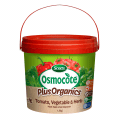
- Scotts Osmocote Plus Organics Tomato, Vegetable & Herb Plant Food
- If growing in pots, a Scotts Osmocote Premium Potting Mix
- Garden trowel
- Wildlife safe crop protection netting
- Mulch
Prepare
Kale prefers a full sun spot in a well-drained soil. If your coolest season is still fairly warm, try growing in part-shade away from the hot afternoon sun.
Growing Kale from seed
Sow seeds into punnets filled with Scotts Osmocote Seed & Cutting Potting Mix - plant 6-12 seeds per punnet - thinning out the weakest seedlings once they’ve all sprouted. Once the seedlings have 2-4 sets of leaves transplant them into your garden or pot allowing 30-45cm between seedlings.
Seeds can also be direct sown into your garden. Sow seeds 1cm deep, allowing 30-45cm spacing between each depending on the variety. Seeds will take 5 to 8 days to germinate.
Growing Kale from seedlings
Plant kale seedlings in a full sun spot, into soil that’s been enriched with Scotts Osmocote Compost Premium Soil Improver and Scotts Osmocote Plus Organics Tomato, Vegetable & Herb Plant Food & Soil Improver. Mix these through the top 10-15cm of soil before planting.
Planting Kale in the garden
Allow 30-45cm spacing between kale seedlings, depending on the variety. Protect young seedlings from slugs and snails by sprinkling around Defender Snail & Slug Pellets. To protect young seedlings from the caterpillar of the cabbage moth (Plutella xylostella) and small cabbage white butterfly (Pieris rapae) use wildlife safe insect exclusion netting.
Lightly mulch the soil around plants after planting with organic sugar cane to retain moisture. Your kale plants will need regular watering throughout the growing season.
How to Grow Kale In Pots
Kale can be grown in pots or planters. When looking for a spot for your kale, choose something that is at least 30-50cm wide and the same deep. If you’re limited with space look for some of the dwarf or slender growing varieties of kale that can be planted closer together.
Fill your pot or planter with Scotts Osmocote Plus Organics Tomato, Vegetable & Herb Potting Mix ready for planting. Lightly mulch the soil around plants after planting with organic sugar cane to retain moisture.
Harvesting Kale
Harvest kale leaf by leaf, when you need it - pick the outer leaves by removing them from the main stem with a downward pulling motion or use sharp snips. Harvest the older leaves first, leaving the central young leaves to continue growing. Regular harvesting will encourage more growth.
Pests & Diseases
Look out for the following pests and diseases attacking kale plants:
- Slugs and Snails - most likely to cause significant damage to young seedlings. Protect young plants by setting beer traps (saucers filled with beer) amongst seedlings or use Defender Snail & Slug Pellets.
- Caterpillars - the white flying adult cabbage moth (Plutella xylostella) and small cabbage white butterfly (Pieris rapae) they lay their eggs onto kale (and other brassica crops) and the small green caterpillars feed on the leaves. To control these pests; remove the caterpillars by hand regularly, use insect exclusion netting over your crops to keep the flying moths/butterflies out or spray infested plants with Defender Pyrethrum Insect Spray.
- Aphids - aphids tend can attack the growing shoots of young or heat stressed kale plants. Keep the water up to kale during the warmer months and if needed remove some of the lower leaves to improve light and air circulation around the plants. Spray aphid infestations with Defender Pyrethrum Insect Spray if needed.
- Fungal diseases - most likely to occur during hot and humid weather. To reduce the risk of fungal diseases, like powdery mildew, make sure your seedlings are given the right spacing and avoid overhead watering.
FAQs
How long does kale take to grow?
Kale typically takes 55-75 days to mature in Australia, depending on the variety and conditions. It’s a year-round grower in most regions, but thrives in cooler weather. If you’re after baby kale, you can start harvesting as early as 25-30 days, while mature leaves are ready in 2-3 months for continuous picking all season long.
How to grow kale in containers?
For container-grown kale, pick a pot at least 30 cm deep with good drainage and fill it with quality potting mix. Plant seeds or seedlings in a sunny spot, though some afternoon shade helps in warmer climates. Keep the soil moist but not soggy, ensure good airflow, and space plants about 30 cm apart to prevent overcrowding. For the best results, plant in autumn or early spring when temperatures are cooler.


