
How to grow & care for microgreens
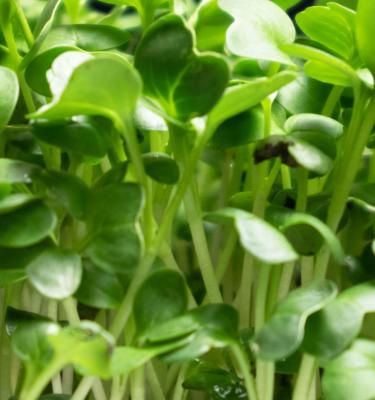
Microgreens are the young and immature seedlings of plants with edible leaves that you can harvest and use for garnish, pops of flavour and added wow factor to your home cooking. Microgreens don’t need a lot of space or time to grow and they’ll fit easily onto a kitchen windowsill where they are in easy reach for watering and harvesting.
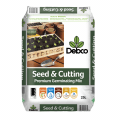
You can use any plant with edible leaves and stems as a microgreen, the trick is to sow them thickly into plant punnets (or even old clean berry punnets) that have been filled with a good quality seed-raising mix like Scotts Osmocote Seed & Cutting Potting Mix. Keep the seeds moist by misting them once or twice a day and before long you’ll have a thick mini-forest of sprouted seedlings.
Microgreens are normally harvested once the first set of true leaves has appeared on the seedlings. So to have a continuous supply, you’ll need to sow a new batch every week or so.
Top 5 steps to growing microgreens
- You’ll need a windowsill that gets bright or morning sun (avoid afternoon sun as this can burn the microgreens easily)
- Use any shallow plant punnet or old berry punnet for your microgreens - just make sure it has drainage holes in the bottom.
- The top 2-10cm of growth should be harvested with a snip of your scissors when the microgreen seedlings have their first set of true leaves.
- Remember to sow seeds thickly for microgreens - this is one case where you need to ignore the spacing instructions on the label!
- Mist your microgreens once or twice a day with water from a spray bottle to keep them healthy and happy. Because they grow so quickly, there is no need to fertilise them.
Shopping List
- Seeds of plants with edible leaves and stems
- Scotts Osmocote Seed & Cutting Potting Mix
- Small pots, punnets or clean berry punnets.
- A misting spray bottle filled with water
Prepare
Choose clean plant punnet or a recycled berry fruit punnet to grow your microgreens in - just make sure it has drainage holes in the bottom.
Fill this punnet with Scotts Osmocote Seed & Cutting Potting Mix, water the potting mix to make it damp and then thickly sow your chosen seeds on the surface before covering them lightly with more potting mix.
Mist with a spray bottle, filled with water, and continue misting once or twice a day until your seeds germinate. The potting mix should be moist, but never soggy.
Place your punnet of microgreens on a windowsill that gets morning sun or bright indirect sunlight - avoid a spot with afternoon sun as it will quickly dry out your microgreens or burn their delicate leaves.
Harvest
Depending on the seeds you choose, microgreens will be ready to harvest within 2-3 weeks from sowing. To harvest use a sharp pair of scissors to carefully snip off the seedlings above the potting mix level.
Once you’ve done a single harvest from your seedlings, the remaining stems, roots and potting mix should be tipped into your compost bin and the next round of microgreens started.
Which plants can I grow for microgreens?
Any plant whose stems and leaves are edible can be grown as a microgreen.
Including;
- lettuce, rocket, and other salad leaves,
- all the brassicas including kale, mustard, watercress, and even broccoli
- radishes including daikon
- beetroots, carrots, and other root veggies but not parsnips as their leaves are toxic.
- peas and beans
- any of the soft green herbs including parsley, coriander, basil, mint
- even sunflower (cut BEFORE the first set of true leaves emerge), buckwheat, linseed, amaranth and perilla are delicious
- Any of the edible grasses including barley grass, oat grass and wheat grass can be grown and re-harvested multiple times as microgreens
Pests & Diseases
Because microgreens are grown quickly over a short period of time and generally indoors in a home environment, they don’t suffer from any pests or diseases.
The most common problem for microgreens is over or underwatering. Too much water or allowing the punnets to sit in water will cause your microgreens to rot. Too little water and they’ll die or burn off quickly.


