
How to grow & care for okra
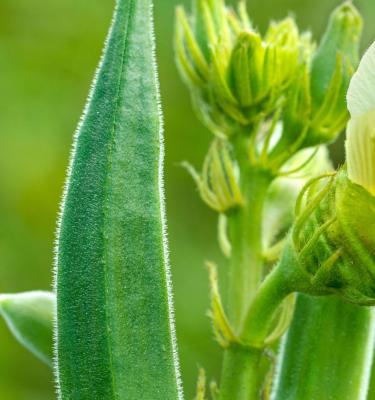
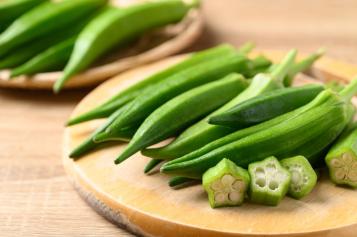
Okra, also known as Lady’s Fingers or Gumbo, produces long pod-shaped fruit that can be used in stews, curries and stir-fries. Okra grows as a 1-2 metre tall bush and likes conditions similar to tomatoes. The fruits have a rather gelatinous quality to them which can actually help thicken sauces and their spongy texture is great at soaking up flavours.
Okra is easy to grow from seeds, as seedlings can be hard to find. It’s generally grown during the dry season in tropical regions and the warmest months in cooler areas.
Top 6 steps to growing okra
- Choose a full sun position with a free draining soil
- Improve the soil before planting by adding Scotts Osmocote Compost Premium Soil Improver
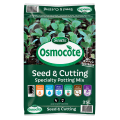
- Sow okra seeds into small pots filled with Scotts Osmocote® Seed & Cutting Potting Mix and transplant into prepared soil once they are big enough to handle.
- Once established okra is hardy and drought tolerant, but they’ll benefit from a deep soaking during extreme heat.
- Okra can be grown in large pots filled with a premium potting mix like Scotts Osmocote® Plus Organics Tomato, Vegetable & Herb Planting Mix
Shopping List
- Okra seeds or seedlings
- Scotts Osmocote Compost Premium Soil Improver
- Scotts Osmocote® Controlled Release Fertiliser: Tomato, Vegetable & Herb
- If growing from seeds, Scotts Osmocote® Seed & Cutting Potting Mix
- and suitable small pots
- If growing in pots, Scotts Osmocote® Plus Organics Tomato, Vegetable & Herb Planting Mix and a suitable pot
- Garden trowel
- Defender Pyrethrum Insect Spray
- Mulch
Prepare
Okra needs a full sun position in a free draining soil. Prepare the soil for planting your okra by enriching it with Scotts Osmocote Compost Premium Soil Improver and a small amount of Scotts Osmocote® Controlled Release Fertiliser: Tomato, Vegetable & Herb - dig these through the top 10-20cm of soil.
How to growing okra from seeds
Okra is readily available as seeds in red or green varieties. Soak your okra seeds in water overnight before sowing, to improve their germination rate. Sow the seeds into small pots filled with Scotts Osmocote® Seed & Cutting Potting Mix - keeping the soil moist until the seeds germinate.
If you live in a warmer, frost free climate seeds can be sown directly into your prepared soil. In cooler climates sow seeds into punnets in late winter or early spring and keep them in a warm protected spot until the risk of frost has passed.
If you’ve started okra seeds in pots, once seedlings are 5-10cm tall they can be transplanted into your prepared garden soil or larger pots to grow on. Allow 50-60cm between plants. Young seedlings will need regular watering to establish them, but as they grow they’ll become hardier and more drought tolerant.
Mulch around your okra plants to suppress weeds and retain moisture. Fertilise with a light sprinkle of Scotts Osmocote® Controlled Release Fertiliser: Tomato, Vegetable & Herb around each plant 4-6 weeks after planting.
How to plant okra in the garden
In cooler climates, start okra seeds indoors in late winter or early spring and plant them into your garden once the risk of frosts have passed and the nights are warmer. In tropical and sub-tropical climates okra is best grown during the dry season.
If direct sowing seeds into your garden follow the instructions under ‘Growing from seeds’ above. Otherwise plant okra seedlings into prepared soil leaving 50-60cm between plants.
Mulch around your okra plants to suppress weeds and retain moisture. Fertilise with a light sprinkle of Scotts Osmocote® Controlled Release Fertiliser: Tomato, Vegetable & Herb around each plant 4-6 weeks after planting.
Planting okra in pots
Okra can easily be grown in large pots, with good drainage that are at least 60cm deep by the same width.
Fill the pot with Scotts Osmocote® Plus Organics Tomato, Vegetable & Herb Planting Mix and either direct sow okra seeds or plant seedlings - you may only be able to fit 1-2 plants per pot. Position your pot in a full sun spot and mulch around the plants to retain moisture and suppress weeds.
Fertilise with a light sprinkle of Scotts Osmocote® Controlled Release Fertiliser: Tomato, Vegetable & Herb around each plant 4-6 weeks after planting.
How to harvest okra
Okra will be ready to harvest 60-80 days after planting. Okra are best harvested when the fruit is small and tender - around 5-10cm long. Use a sharp knife or secateurs to cut each fruit from the plant.

Pests & Diseases
Okra is likely to suffer from fungal problems if grown during the most humid months of the year or if the plants are too close together. To prevent fungal diseases, grow okra during the dry season in the tropics and subtropics and allow 50-60cm between plants to improve airflow.
Outbreaks of aphids or mites can easily be controlled with a spray of Defender Pyrethrum Insect Spray as per the label instructions.


