
How to grow & care for patty pan squash
Squash or patty pan squash as they are often called - because of their UFO like shape - are an easy to grow summer vegetable. As patty pan squash are related to the zucchini their foliage and growth habit is very similar.
The single serve, palm sized squash and their buttery flavour are the main reasons gardeners are drawn to these fun little vegetables. They are also very fast growing and will be ready to begin harvesting 5-7 weeks after planting.
You’ll find patty pan squash in yellow, white and pale green colours - most readily available as seed. Seedlings may be available from your local garden centre during the warmer months.
Top 4 steps to patty pan squash
- Choose a full sun position with a free draining soil
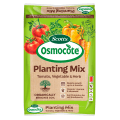
- Improve the soil before planting by adding Scotts Osmocote® Compost Premium Soil Improver and Scotts Osmocote® Controlled Release Fertiliser: Tomato, Vegetable & Herb
- Direct sow patty pan squash seeds into prepared soil, allowing 80-100cm between plants. Or start the seeds in punnets before transplanting into the garden.
- Harvest patty pan squash using a knife to carefully cut them from the plant
Shopping List
- Patty pan squash seeds or seedlings
- Scotts Osmocote® Compost Premium Soil Improver
- Scotts Osmocote® Controlled Release Fertiliser: Tomato, Vegetable & Herb
- If growing from cuttings or in pots, Scotts Osmocote® Plus Organics Tomato, Vegetable & Herb Potting Mix and a suitable pot
- If starting seeds in punnets or small pots you’ll need Scotts Osmocote® Seed & Cutting Mix
- Garden trowel
- Mulch
- Defender™ Snail & Slug Pellets
Prepare
Choose a full sun spot with a free draining soil for your patty pan squash or grow in raised beds or large trough planters.
Enriched the soil before planting with Scotts Osmocote® Compost Premium Soil Improver and a small amount of Scotts Osmocote® Controlled Release Fertiliser: Tomato, Vegetable & Herb - dig these through the top 10-20cm of soil before planting.
Planting in the garden
Direct sow patty pan squash seeds into prepared soil - once the risk of frost has passed and the soil has warmed up. Planting them 10-12mm deep and allowing 80-100cm between each seed.
If you’d prefer to start patty pan squash seeds in punnets sow 2-3 seeds into small pots filled with Scotts Osmocote® Seed & Cutting Mix. Once the seedlings are 10cm tall they can be transplanted into your prepared garden bed.
Keep the soil moist, but not soggy while the seeds germinate - which will take 6-10 days.
Planting in pots
Patty pan squash isn’t typically recommended for growing in pots because you won’t fit many plants in a pot! However if you have to grow in pots - choose a large and long, trough style planter and you might be able to squeeze in 2-3 plants depending on its size. Allowing the plants to trail over the sides will increase your growing space.
Fill the pot with Scotts Osmocote® Plus Organics Tomato, Vegetable & Herb Potting Mix and sow the patty pan squash seeds 10-12mm deep, allowing 80-100cm between plants.
Harvest
Patty pan squash are ready to start harvesting 5-7 weeks after planting. These petite squash are best eaten when no larger than the palm of your hand.
Harvest patty pan squash using a sharp knife to cut the stalk that attaches them to the plant. Unlike pumpkins and tougher skinned relatives patty pan squash don’t store well - so they are best picked and eaten the same day.
Pests & Diseases
Slugs and Snails will cause significant damage to patty pan squash seedlings and even young fruit. Protect your crop by setting beer traps (saucers filled with beer) or use Defender™ Snail & Slug Pellets.
To reduce the risk of powdery mildew and other fungal diseases on the foliage - avoid overhead watering.


