
How to grow peas in New Zealand
Nothing beats homegrown garden peas for their tenderness and taste. Pick them when small, steam within an hour of picking with a sprig of mint - there is no better taste than garden fresh peas. Peas are suited to cooler climates, or in warmer climates grown in the cooler months of the year.
When to grow peas in New Zealand
- Sow – April to October
- Harvest – December to March
Pea varieties to grow
There are lots of different types of peas and numerous varieties. To produce crops all summer long, start by sowing an early variety, followed by a main crop. Check seed packet recommendations for planting seasons.
Sugar snap and snow peas are eaten pod and all, picked before the peas have fully developed. Both are generally easier to grow than garden peas and are worth trying if you've had problems trying to grow other garden pea varieties in the past.
Early: Dwarf Massey Earlicrop.
Main crop: Greenfeast, Alderman, Onward.
Snow peas: Oregon, Goliath.
Sugar snap: Sugar Snap climbing and dwarf.
Dwarf: Novella
Grow your plant
Sow pea seeds directly into the garden in autumn and in early spring.
Step 1
Before planting dig Scotts Osmocote Compost & Soil Improver into the garden bed to a spade depth (approx. 20cm). Water well.
Step 2
Sow seeds directly into the soil 2cm deep and 8-10cm apart. Lightly cover the seed and water well. Keep soil moist, not wet, during germination.
Step 3
Once seed has germinated climbing peas will require a frame. Use either bamboo stakes formed into a tee pee or tripod, wooden stakes, trellis or wire netting. Put this in place before planting or before plants establish to minimise root disturbance. Dwarf peas do not require staking.
How to grow peas indoors
If soil temperatures are still cold in late winter early spring, get a head start by starting seeds off inside before planting out.
Step 1
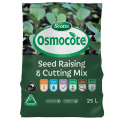
Fill a seed raising tray or small pot with Scotts Osmocote Seed Raising and Cutting Mix. Keep moist, not wet, during germination.
Step 2
Sow seed 2cm deep, water well and place on a sunny windowsill or in a warm sheltered spot where they can be watered until germinated.
Step 3
Once germinated, harden off by placing outside during the day and bringing in at night, do this for 7-10 days, now they are ready to plant.
Step 4
Soak the plant in a bucket of water before planting, allow to drain. Remove the plant from the pot and avoid disturbing the roots. Dig a hole twice the width of the root ball, place the plant in the centre of the hole, back fill and firm gently, planting to the same soil level as the pot. Water in well and continue to water regularly.
Tips
Peas are legumes that absorb nitrogen from the air and fix the nitrogen to tiny nodules on the roots and store it in the soil, so avoid applying nitrogen rich fertilisers to pea crops.
Peas will tolerate cold temperatures as low as -2 degrees. In cooler regions for autumn planted peas mulch around the peas with Scotts Pea Straw Mulch, and add a light covering of mulch over the peas for protection. Mulch before the first frost and the soil temperature drops.
Planting peas in pots and containers
Step 1
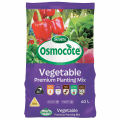
Follow sowing seeds indoors instructions for plant seedlings. Choose a pot at least 40L in size. Fill with a quality potting mix such as Scotts Osmocote Vegetable Mix.
Step 2
Place bamboo canes in a tee pee and tie at the top for the plants to climb up. Soak the plants in a bucket of water, drain before planting. A 40L pot will take 3-5 plants.
Step 3
Remove the plant from the pot, avoid disturbing the roots as much as possible. Dig a planting hole twice the size of the root ball, place the plant in the centre of the hole and back fill, gently firming as you go. Water in well.
Step 4
Place the pot in a sunny sheltered spot, water well and consistently water throughout the growing season.
Tips
Peas easily grow in pots and containers. Climbing peas will require a support frame, trellis or bamboo stakes to climb up, dwarf peas are perfect for pots, as they do not require a climbing frame. Ensure they are consistently watered to get the best crop.
Pea plant care
- Peas need a free draining soil, rich in organic matter, such as compost. Plant in a sunny position that is sheltered from strong winds to ensure insects can pollinate the flowers.
- When flowering starts, feed with Scotts Sheep Pellets.
- Water plants well, especially during dry spells and mulch around plants with Scotts Pea Straw Mulch to help conserve soil moisture and suppress weed growth.
- Protect seedlings from slugs and snails with Scotts Quash Slug and Snail Killer.
Harvesting peas
Pick pods from the bottom up. Sugar snap peas are ready when peas start to form in the pod and can be eaten directly off the plant. Snow peas are ready when the pods are 5cm long, crisp and sweet, don’t leave on the vine for too long otherwise they become tough and stringy. Shelling peas are ready when the pods have swelled and are a deep green colour.
Tips
Avoid wetting the foliage when watering to help prevent the spread of disease. Space plants out to ensure there is good air circulation around the plants.
Pea plant tendrils are edible and great for salads and stir fries.


