Whether you’re growing herbs, vegetables or flowers, greenhouses are invaluable for cultivating plants that need protection year-round. However, plants aren’t the only organisms that thrive in a conservatory – pests and diseases love them too.
If you want to maintain the ideal environment for your plants to grow, it’s absolutely essential to keep your greenhouse clean and tidy. From improving growing conditions to reducing the risk of harmful bugs and pathogenic organisms, there are so many good reasons to add greenhouse cleaning to your list of yearly garden tasks.
In this guide, we’ll show you how to clean a greenhouse effect in a few simple steps.
Why it’s important to clean your greenhouse
The humid conditions in a greenhouse provide an excellent breeding ground for several types of pests, bacteria and organisms.
Green growths such as algae are especially common and problematic as they can accumulate on glazing, significantly reducing the amount of light entering the greenhouse.
An annual cleaning is the most effective way to eradicate destructive pests, maximise light levels and keep plants healthy.
When to clean your greenhouse
The best time to clean your greenhouse or conservatory is when it’s likely to be at its emptiest. Try scheduling a major clean in early spring (just prior to seed sowing) or autumn, before you fill the greenhouse with tender plants over winter.
Whatever season you choose, be sure to set aside an appropriate day for the task - ideally in dry, mild weather.
How to clean a greenhouse in 5 steps

Step 1: Clear the area
First, start by emptying your greenhouse and completely clearing the area around it. If necessary, cover your plants or move them into a sheltered place, such as a shed, while you clean.
Beginning at the top and working your way down, sweep or brush walls and the structural frame of the greenhouse to get rid of dust and debris. Bacteria and other pathogens can be lodged in places like window ledges and in between panes, so extra care is needed to clean these areas.
If you have a heated greenhouse, don’t forget to cover electrical sockets before you move onto the next step.
Step 2: Wash and rinse
Clean the exterior of the greenhouse by thoroughly wiping over every pane. Use a solution of warm soapy water and a sponge to scrub off any dirt, moss or algae. Then, attach a jet wash attachment to the end of a garden hose and rinse.
To reach higher parts of the greenhouse or conservatory, use a stable step ladder or attach a sponge to the end of a broom handle. When using a ladder, make sure it’s placed on steady ground and be careful not to press too hard on the glass or glazing.
Wash down the inside following the same steps you carried for the outside. Scrub down all surfaces to remove traces of mildew and grime, and pay extra attention to any small gaps and crevices where algae and organisms can collect. Sanitise pots, tables and trays before returning them to their original place.
Step 3: Remove debris from gutters
While you’re cleaning your greenhouse, it’s also a good idea to check your gutters for any blockages.
If you notice a build-up of unwanted material, put on a pair of rubber gloves and run your hand along the inside length of the gutter. Scoop out any debris that has accumulated, and flush away remaining dirt with a hose or watering can.
Step 4: Apply a disinfectant treatment
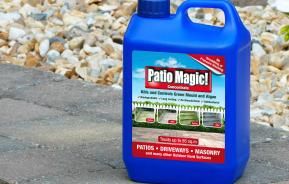
Next, apply an antifungal treatment to keep mould and algae at bay. Specialised greenhouse disinfectants will completely destroy mould and algae within a few days and keep growths from recurring.
This powerful formula does all the hard work for you – there’s no need to scrub before applying. Simply dilute the concentration in a watering can (as per pack instructions) or low-pressure garden sprayer and thoroughly coat your greenhouse or conservatory.
Step 5: Allow it to air dry
Once your greenhouse is washed and disinfected, ensure it’s well ventilated and allow it to air dry. When everything is sparkling clean, return your plants to their pristine home!


