Everybody enjoys finding the time to sit back, put your feet up and relax with a tasty beverage. For many the beverage of choice is beer, but with the rising costs of alcohol, not everyone feels they can indulge as often. So for those of you that would like the opportunity to create your own and experiment with flavours here are a few things to get you started.
The main ingredients for any good beer are hops, which are combined with grain, yeast and water. Hops are a flower from the female version of the plant Humulus Iupulus which is part of the hemp family. It is a little green flower which resembles a pine cone containing aromatic resins, oils and alpha-acids which form a bitter flavour. These are found in the yellow lupulin glands and the ratios of each can differ in hops creating alternate flavours and aromas.
What Are Hops Used For?
Whilst it can be challenging to grow hops, they are a fantastic addition to beer as the bitterness counters the sweetness from the malt, making a better-balanced beer whilst also acting as a preservative due to its antibacterial properties. For this reason, hops when dried can also be used in certain types of medicine.
Growing Hops In Your Garden
So where should you start when learning how to grow hops? The first step is to find the most suitable location for the plant to grow. Hops need about 6-8 hours of sun a day so the position is very important. When looking for the perfect positioning you can monitor your garden over hourly intervals to see which area gets the most sunlight across the day, allowing you to determine where your plant will get the most exposure. Hops are a shooting plant and have similar properties to vines (known as hop bines), therefore will require a good vertical space to allow them to grow to their full potential which can be up to 25ft.
The first step to starting your hop plant is to get what is called a rhizome. This is a piece of hop that will sprout roots when planted and can be purchased online or from local homebrew shops. If not planting immediately the rhizome will need to be wrapped in a damp paper towel and kept in the fridge to preserve it.
Planting Hops Plants
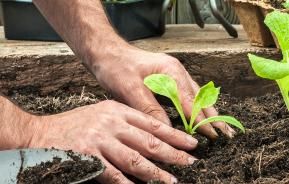
The rhizome will need to be planted about four inches deep in aerated soil rich in nutrients with good drainage. Plant the rhizome horizontally, or with any visible buds pointing up. If planting more than one at a time, or different varieties together, place them at least 2ft apart to allow the roots space to grow. Once placed cover with a lightly packed soil or high nitrogen mulch.
Training/stringing Hops
For your hops to grow properly you will need to have something in place to assist in supporting the vines as they grow vertically. Some ideas for this include a lattice/trellis, bamboo, poles or string. The most commonly used is a rough twine like a string which allows the bines to grab on to it, which in turn will make it easier to train the bines and make harvesting easier.
Once the hops have grown to between 6 and 12 inches trim the
rhizome four or six bines each and begin to train them around your chosen type of support. This can be fiddly as it is done by hand, gently weaving the vines around the support in a clockwise formation. If done anti-clockwise the hops will fall off. A popular method is to have two tied off string supports with 2 or 3 bines trained around each. After about two months of growing, trim the bottom leaves to avoid anything damaging being picked up on the leaves from the soil.
Harvesting Hops
Once fully grown you will be able to tell if your hops are ready for harvest by the colour and texture of the cones. Ripe, mature cones will be dry to the touch with a strong aromatic odour and when touched will leave a residue of yellow lupulin powder on your fingers. It is important to pick them at the correct time and before they turn brown to get the best from your hops. If you are unsure you can pick one and break it open and if fully ripened it should be filled with a thick yellow-gold powder.
Check each hop individually as some may ripen quicker than others and pick as appropriate. If you have checked all the hops on a bine and found they are all ready to be picked, you can cut the bine and the string at the base and lay it flat on the ground in order to pick the hops.
Storing Hops After Harvest
After harvesting your hops, dry them thoroughly before they can be used for home brewing. The time this takes can vary depending on the type of hops and can be done in a warm dry spot in your home out of direct sunlight. If in no rush they can be left for a week or two to dry properly or some have suggested using a fan on a low heat setting to assist in the process. When the cones are completely dry you can put them in zipping lock airtight bags and store in the freezer.
Hops are a perennial plant, therefore, will start to produce more hop cones each year they mature. The first year from planting will only produce a small amount but by the third year, some types will yield 1 to 2 pounds of cones per plant. So there can be no excuses, now you know how to grow hops. Get gardening now and be ready for your party next summer with a refreshing batch of homebrew!

