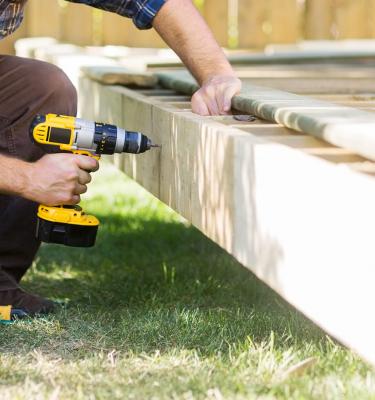
As the garden is an extension of our living space it makes sense that we have dedicated areas in which we can work, rest and play. However, we don't all like the idea, or look of covering our gardens with concrete to achieve it. Laying decking is a wonderful, hardwearing, natural alternative to patios that adds texture and warmth to our outdoor room.
Decking allows us to get creatively practical with the more adventurous among us incorporating lighting, sunken flower beds and even water features into the design (in-built hot tub anyone?). Before we get ahead of ourselves though, here’s our guide to laying a basic deck.
Mark out your decking space
This might seem obvious, but start by measuring out the area you wish to cover in decking to make sure that there is room for any furniture you might want to put on it. There would be nothing more heartbreaking than to spend time, money and effort in putting together your decking, only to find out that only your table and two chairs will fit instead of the required six! Mark out with a long hose, pegs and string or spray paint, remember to make a note of the measurements.
Draw a plan for where you will be laying decking
Now that you know the width and depth of your decked area, draw the area on to paper. From this plan you will be able to accurately calculate what quantities of materials you require to reduce cutting and wastage (take it along to the store where you buy the decking so your calculations get double checked). Start by drawing the grid which will form the sub-frame of your structure, remembering that you will need an external frame within which additional supports will be positioned at regular (usually 40cm) intervals. This plan should be drawn on graph paper so that it is as accurate as possible.
Start the ground work
Decking can be positioned virtually anywhere in the garden. If it is going over an existing patio, then you have just saved yourself some hard work as you won't need to create a new foundation, it can go straight on top with a few adjustments if the area is smaller or larger than its current size. However, if it is going to be installed on new ground, you should create a simple foundation by removing the top layer of turf to the depth of a paving slab (approximately 5cm) to the size of the space required.
To ensure that your decking does not collect water (thereby turning to an ice rink in the winter months or a paddling pool in the summer) allow a slight slope to the gradient of 1:80, which will allow rainwater to run off onto the lower level. Ensure that the ground is firm and level before covering with a weed-control fabric (there is nothing more unsightly than weeds poking their spindly arms through a beautifully laid deck) and a layer of gravel.
Place paving slabs (for additional stability) at all corners and midway along each of the supports (this is where your plan comes in useful for accurate positioning).
Create the sub-frame
The sub-frame is the timber grid that you started your plan with, so find that plan again and lay your timber out to create the grid. Join the frame at each corner, ensuring that it remains flat and square and is fully supported by the paving slabs. Fix the intermediate supports within the frame, again ensuring that they are evenly spaced, are flat and are supported at their mid point. Continue until the entire sub-frame has been constructed.
Attach the deck boards
Now for the fun part, lay the deck board on to the subframe and screw into place using two deck screws (which won’t need pilot holes) or galvanised screws (which will). Remember to fix the boards to all supports on the subframe. Allow a 3mm gap between each adjacent board, which will allow for drainage and expansion through the seasons.
For a more attractive finish stagger the joins of the boards, which does mean that you will need to cut the overhanging ends, and paint it with a timber preserver to ensure its longevity. For a neat, professional finish, add deck boards around the sides of the frame.
Finally, sit back, relax and enjoy your new outdoor space!


