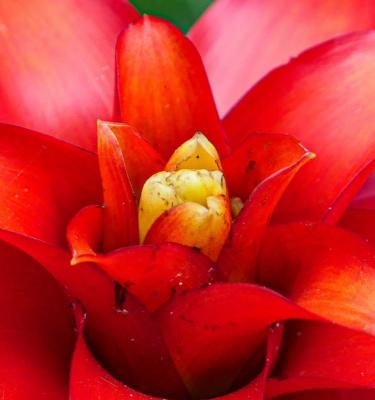

How to Grow and Care for Bromeliads
Bromeliads (Bromeliaceae) are a diverse group of plants with a very tropical vibe. With over 3000 different species in the bromeliad family there is one to suit any garden. Some love full shade, while others thrive in sunny spots. They come in a range of colours, shapes and sizes too.
All bromeliads are epiphytes which means they grow happily without soil - often in the branches of other plants or rockeries. Because of their shallow root systems, many bromeliads will also grow in shallow, free draining soil too.
Despite their tropical appearance, there is a bromeliad to suit nearly any climate in Australia - ask at your local garden centre or nursery for what works well in your area.
Top 5 Steps to Growing Bromeliads
- Find a bromeliad that will tolerate your climatic conditions - they don’t just grow in the tropics!
- Depending on which bromeliad you choose, they can grow without soil or be planted into shallow, free draining soil.
- Many bromeliads absorb most of their water through their leaves or via a storage well in the centre of their whorl of leaves.
- Bromeliads grow well as understory plants in the garden, in pots or even as houseplants.
- If growing bromeliads in pots create the ideal potting mix by mixing together 50% Scotts Osmocote Orchid Premium Potting Mix and 50% Scotts Osmocote Indoor Plant Potting Mix.
Shopping List
- A bromeliad plant to suit your climate and garden
- Scotts Osmocote All Purpose Controlled Release Fertiliser
- Garden shovel
- Defender Pyrethrum Insect Spray
- If growing in pots, you’ll need:
- Scotts Osmocote Orchid Premium Potting Mix
- Scotts Osmocote Premium Potting Mix for Indoor Plants
- Suitable pot or container
Preparation & Planting in the garden
Choose a bromeliad to suit your climate and garden. Most bromeliads prefer a filtered sun position with a free draining soil. If your soil is prone to waterlogging or isn’t free draining, plant your bromeliads on mounds, raised planters or even pots.
Dig the planting hole for your bromeliad and remove it from the nursery pot. Position the plant into the centre of the planting hole and backfill around the root ball, making sure the centre of the bromeliad sits above the top of the soil.
Water in well, ensuring the centre well of the bromeliad is filled with water too. In spring and again in autumn fertilise your bromeliad with Scotts Osmocote All Purpose Controlled Release Fertiliser sprinkled around the root zone of the plant.
Different types of Bromeliads
Some of the easiest bromeliads to grow are:
- Aechmea spp. or Urn Plants - Beautiful bromeliad with an urn-like shape, that produces a spear shaped flower.
- Alcantarea imperialist or Imperial Bromeliad - A massive plant with individual leaves that are up to 1.5m long. The flower spikes are also impressively sized, reaching up to 2.5m tall.
- Billbergia nutans or Queens Tears - Unusual pink, green and blue flowers that hang down from the plant.
- Guzmania lingulate or Vase Plant - Very common and easy to grow a great bromeliad for beginners.
- Tillandsia spp. or Air Plants - These wonderful plants don’t need soil or ground contact to grow. They can be wired onto boards or screens or simply placed onto a surface indoors or out.
- Vriesea splendens or Flaming Sword - Has horizontal bands on the leaves and a flattish red flower.
- Wallisia cyanea or Pink Quill - A good species of bromeliad for cooler parts of Australia, easy to grow and produces a vivid violet-blue spike of flowers.
Given the wide and diverse range of Bromeliads, always check the label for additional specific growing needs and to know if they’ll suit your climate.
Planting in pots
Choose a pot no more than twice the size of your bromeliads nursery pot and make sure it has plenty of drainage holes. Unsealed terracotta pots are ideal for bromeliads.
Fill your pot or planter with a mix made by combining 50% Scotts Osmocote Orchid Potting Mix and 50% Scotts Osmocote Indoor Plant Potting Mix.
Gently remove the bromeliad from the nursery pot and position it into the potting mix, backfill around the root ball ensuring the centre of the bromeliad sits just above the soil surface.
Water your new bromeliad in well and make sure the centre well of the plant also contains water.
Fertilising & Care
Bromeliads like a humid environment, with good airflow. Keep their centre well full of water and the soil around them slightly moist, but never soggy.
During very hot, dry weather, or if kept indoors, they’ll benefit from regular misting with a hose if outdoors and/or with Scotts Osmocote Indoor Mist+Feed.
Potted bromeliads like to be fed fortnightly with Scotts Osmocote Indoor Plants Pour+Feed and once a season with Scotts Osmocote All Purpose Controlled Release Fertiliser.
Outdoor bromeliads should have Scotts Osmocote All Purpose Controlled Release Fertiliser applied around their root zone in Spring and again in Autumn.
Pests & Diseases
Rotting at the base of bromeliads can be a problem if the plants receive too much water, are planted into a waterlogged soil or they don’t get enough airflow. Reduce the risk of rot occurring by planting into a free draining soil and ensuring they have good airflow between plants.
Aphids and scale can from time to time become a problem on bromeliads, particularly on soft new growth. Use Defender Pyrethrum Insect Spray to control them if needed.


