Mushroom growing kits
The best and easiest way for beginners to start growing their own mushrooms is to buy a ‘Grow Your Own Mushrooms’ kit. Mushroom growing kits can be purchased according to the type of mushrooms you wish to grow and contain everything you need to successfully grow your own mushrooms.
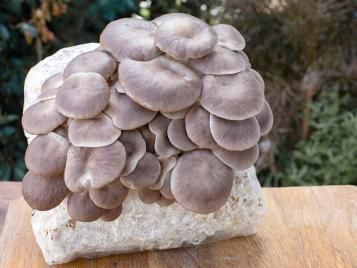
Oyster mushrooms grow on straw and so a kit for this variety would include a breathable bag of straw, mushroom spawn and a bag tie. Button mushrooms like to grow in a tray of composted manure and this would be the substrate included in your kit. Shiitake mushrooms grow on wood and are supplied in a specially created growing block (or log) which contains all the nutrients required for a successful shiitake harvest. Full instructions are usually included in the kits.
Most of these mushrooms will be grown in a dark place and will fruit fairly quickly. They are a great way of seeing how mushrooms develop and it’s fascinating to see how quickly they grow.
How to collect mushroom spores
If you feel that you are more advanced and want to start growing mushrooms from the very beginning then you will need to get hold of some mushroom spores. The spores are microscopic in size but contain the blueprint for new mushroom growth. A mature mushroom is said to contain up to 16 billion spores and so this gives plenty of opportunities to propagate.
It is relatively easy but quite time consuming to collect your own spores as all you need is a mushroom (but make sure it's a known edible variety), some paper and glass. Carefully remove the stem from the mushroom and gently remove any skirt that may be present protecting the gills in the mushroom head.
To take the spore print all you need is the top of the mushroom with the gills exposed on the underside. Place the mushroom with the gills face down onto the paper and pop a glass over the top. Leave this for 24 hours. When you return, remove the glass and gently lift the mushroom. The spores will have fallen from the cap and you should see a print on the paper, which replicates the gill pattern from the mushroom. This is the spore print which can then be used to grow your own mushrooms.
Keep the print in a sealed bag in a cool, dry, dark place until you are ready to cultivate.
How to cultivate mushroom spores
Once you have a spore print (by following the instructions above) you can then use it to cultivate and grow your mushrooms. This can be done by creating a spore syringe, where the spores are re-hydrated using sterile water and then used to inoculate the growing medium.
To create a spore syringe you need to work in a sterilised environment and with distilled water that has been boiled 2 or 3 times to ensure that any bacteria has been eliminated. Make sure that your syringe needle is sterile by holding it in a flame for a few seconds.
Draw some of the cooled, sterilised water into the syringe body. Using the syringe needle, lightly scrape the spores from your spore print into a sterilised glass. Expunge half of the water from the syringe into the glass. Draw the spore water back into the syringe. At this point, you should notice that the water has become slightly discoloured and you may even be able to see some floating clusters of spores. This spore water can then be used to inoculate your growing medium.
How to germinate mushroom spores
As the spores don't contain chlorophyll they feed off substances other than light to gain the nourishment they need to germinate. Suitable materials range from sawdust and straw to wooden plugs and grain. The variety of mushroom dictates the most suited material as different types of mushroom grow in different materials (the substrate) from straw to wood chips.
Blending together the spores and the nutrients provided by the suited substance is known as the spawn. The spawn allows the mycelium to develop. The mycelium is the fungus from which mushrooms emerge during fruiting. When the spawn is mixed with a substrate fruiting tends to be more vigorous and mushrooms are more plentiful.
Different types of mushroom
There are over 14,000 different types of mushrooms, many poisonous and many deliciously edible. Some of the more popular varieties can be grown at home by following a few simple instructions.
Wood-loving mushrooms include oyster, shiitake and lion’s mane to name the more popular varieties. Compost lovers include the Button and Portobello varieties.
How to grow oyster mushrooms (Pleurotus ostreatus)
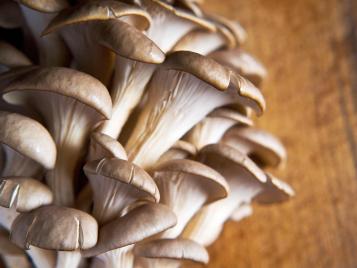
Oyster mushrooms are among the more colourful varieties of mushrooms and in the wild are found helping with the decomposition of dead trees.
You can grow oyster mushrooms at home and if you invest in a kit, it will more than likely include a perforated bag of straw that has been inoculated with oyster mushroom spawn and already has some degree of mycelium developing. The kit should be kept moist or in a humid environment and will usually fruit twice. After the second harvest, any remaining mycelium could be used to inoculate an additional growing medium.
Oyster mushrooms prefer to be grown on logs, or in dead trees, and you can recreate this by using a hardwood log and dowel spawn. Most hardwoods can be used although apple, sycamore and ash are not recommended. Ensure that the log was cut from a healthy tree and not more than 6 weeks previously. Equally, if you already have mycelium from an Oyster mushroom kit, you could drill 10mm holes at regular intervals along with the log and carefully insert the leftover mycelium.
Keep moist and regulate the temperature, in 6-12 months the mycelium should have taken hold over the log and be ready to fruit. If the mycelium has grown into the log it will continue to fruit until all available nutrients have been used in the decaying log.
Growing Oyster mushrooms can be done by mixing the spawn with some sawdust, used coffee grounds and straw. Place the mixture in a plastic bag and leave in a cool dark environment. It may take a few months but fruiting should occur.
How to grow shiitake mushrooms (Lentinula edodes)
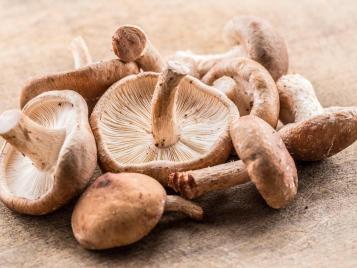
Growing Shiitake mushrooms can be done in the same way as Oyster mushrooms and as part of a kit, you will be supplied with wooden dowels that have been impregnated with the shiitake mycelium. These wooden dowels are then inserted into a hardwood log that has been prepared by drilling holes at 6-inch intervals along the length of the log. Once the dowels have been inserted they are sealed using wax which ensures that the dowel spawn doesn't dry out.
Shiitake mushrooms can also be grown on blocks of sterilised sawdust. Fruiting is likely to happen quicker by using this growing medium rather than a hardwood log, but the quality of the mushroom will not be as good.
How to grow white cap (button) mushrooms (Agaricus bisporus)
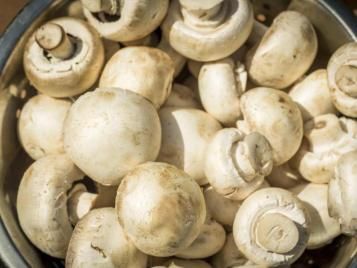
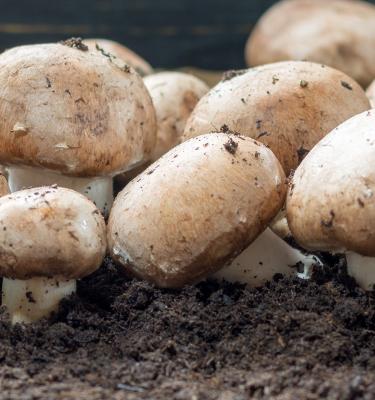
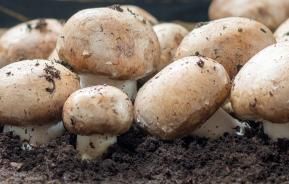
Growing button mushrooms is the most straightforward of all methods and Agaricus bisporus also includes the popular, nutty, Portobello (or brown cap) mushrooms. Kits for these varieties will include a tray and lid and a pre-spawned substrate or compost. If you don't buy a kit then follow the instructions above to create your own spore print and spore syringe with which you will be able to inoculate the compost.
For best results, make your compost out of a mixture of horse manure and wet straw. Mix the two together and pack down tightly to allow the temperature in the manure to rise. Turn this mixture every couple of days for 2 or 3 weeks to allow the manure to rot down and concentrate the nutrients required for mushroom growing. When the mixture is dark brown and sweet-smelling then you have great compost.
Put enough compost in a tray to cover to a depth of about 3 inches then spray over the spore syringe to inoculate. Mix again and cover with a damp newspaper. In 2-3 weeks the mycelium should be showing signs of growth. Once the tray has become covered with the tiny white threads of the mycelium, then wet and cover with a layer of the casing which can be made of peat-free compost with 2 or 3 handfuls of lime.
Keep the casing moist and the air temperature warm and fruiting should begin in 3-4 weeks.
Have you grown your own mushrooms? What variety have you found easiest? Let us know via our social media channels!
